
When you’re troubleshooting, the last thing you want is guesswork. That’s why I always start by finding a faulty switch with a voltage tester—the right one. I was helping a friend with a bad single-pole switch—it looked simple. But what made the difference was using the right voltage tester and not falling for false positives from a cheap, bargain-brand tool.
Here’s what really happened—and how my Klein voltage tester proved exactly why I trust it on every job.
How to Find a Faulty Switch with a Voltage Tester That Works

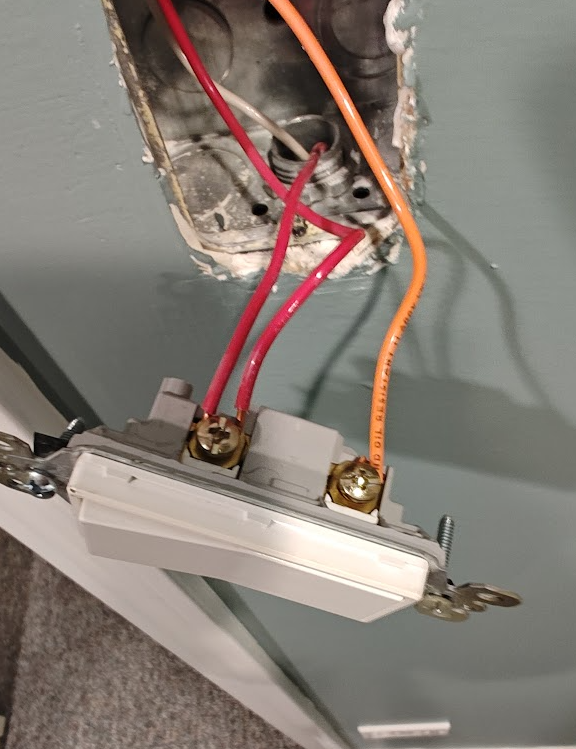
I started by testing the red wire (hot) at the switch. As expected, the Klein NCVT1P gave a clear audible beep and red LED indication. So far, so good.
But when I tested the orange switch leg, even with the switch in the off position, the tester still showed voltage: audible signal + red light. That told me something wasn’t right.
Confirming a Faulty Switch
The tester was picking up voltage leaking through to the switch leg—even when the switch was open (in the off position). That was the problem.
So I simply replaced the switch with a new single-pole.
After the replacement, I retested with the Klein Voltage Tester:
- Hot (red wire): tester indicated correctly—audible and red.
- Switch leg (orange wire): green indication when in the off position—on both the switch terminal pole and the orange switch leg conductor, and then when I switched the switch to the on position, the tester properly indicated voltage was present.
That’s exactly what you want: simple, clear, and reliable results that reflect what the circuit is doing—not what a cheap tester thinks it sees.
What the Inexpensive Tester Did (and Why I Don’t Trust Them)
Once I replaced the switch, my friend handed me a bargain tester from the local hardware store—and I showed him exactly why I don’t trust low-cost voltage testers.
No matter where I held it—hot side, switch leg, neutral, even after the new switch was installed—it just kept lighting up and beeping. It made everything in the box look hot (energized), even when it wasn’t.
That’s the problem with low-cost testers. They’re often overly sensitive, unreliable in tight junction boxes, and prone to false positives. In a box packed with hots, switch legs, and neutrals, they create more confusion than clarity—and that’s not something I’m willing to work with when safety is on the line.
That’s why I stick with Klein. It works when it counts.
Why I Use The Klein Voltage Tester
- Klein NCVT1P gives pinpoint voltage detection from 50–1000V AC
- LED + audible feedback is clear, consistent, and not overly sensitive
- I’ve used it for probably over 30 years—and it hasn’t let me down once
- Klein has been building tools since 1857—Their American-made and trade-proven
Whether I’m checking a switch leg, confirming power before replacing a device, or verifying that a circuit is truly de-energized—I want a tool I can trust.
I Also Demonstrated: The Klein ET310 Circuit Breaker Finder
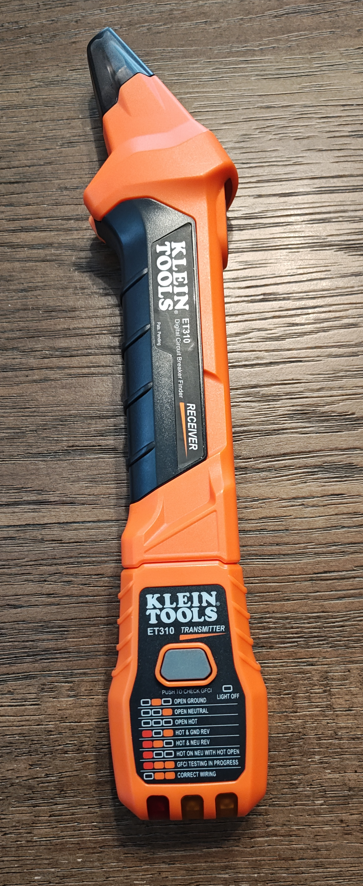
In the same video, I also demonstrate the Klein ET310 Circuit Breaker Finder—another excellent tool I use all the time.
This two-piece tool makes it simple to find the correct breaker so you can de-energize the circuit and work safely:
- Just plug the transmitter (plug tester) into the live receptacle or circuit
- Then go to your panel and scan each breaker with the receiver
- When you hit the right one, you’ll get a solid tone and red LED indicator
- Open the breaker (switch to off position), verify the circuit is dead, and you’re good to go
It’s fast, accurate, and helps avoid the old “flip and guess” method—especially helpful in homes with poorly labeled panels or tandem breakers.
🎥 Want to See It All in Action?
I walk through this exact scenario in my Short video—showing how I tested both sides of the switch, what the faulty readings looked like, how I verified with the Klein tools, and how I found the correct breaker using the ET310.
Tools Featured in This Post
If you’re interested in picking up the exact tools I used in this video and walkthrough, here are the links:
- Klein ET310 Circuit Breaker Finder + GFCI Tester: https://amzn.to/44hK8Ax
- Klein NCVT1P Voltage Tester: https://amzn.to/3ImvAGU
These are tools I actually use and trust—and as an Amazon Associate, I may earn a small commission if you pick one up, at no cost to you.
Final Takeaway
If I had relied on that cheap tester, I would have assumed everything in the box was hot and maybe never found the bad switch. Instead, I used a tool I know and trust, confirmed what I was seeing, and fixed the problem in minutes.
When it comes to electrical work—whether you’re a pro, an inspector, or a serious DIYer—don’t risk bad reads. Use the gear that gets it right.
If want to make sure you’re using the right tools the right way, check out my post on GFCI testing.: How to Pass Your GFCI Inspection
For more pro-level walkthroughs, inspection tips, and tool insights, visit subscribe to receive code tips below.